The Art of Browned Butter Cookies: A Flavour-Rich Recipe with Pep Pans
There’s something deeply comforting and irresistibly moreish about a homemade cookie, especially one made with browned butter. The nutty depth, chewy texture, and caramelised aroma elevate even the simplest biscuit to patisserie-level delight. In this guide, we'll walk you through how to make perfect browned butter cookies, discuss why this technique adds so much flavour, and show you how the Pep Pans Non-Stick Baking Tray makes all the difference when baking these buttery delights.
What Is Browned Butter?
Browned butter (or beurre noisette, as it's known in French cuisine) is butter that has been gently cooked until the milk solids separate and toast, turning a golden brown. This process transforms ordinary butter into something truly magical—imbuing it with a deep, nutty aroma and a warm, toffee-like flavour.
Benefits of Using Browned Butter in Baking
-
Enhanced Flavour: The Maillard reaction that occurs while browning butter brings out toasty, nutty, and even caramel notes.
-
Improved Texture: Browned butter contributes to a chewier, slightly crisp texture in cookies.
-
Aromatic Appeal: The scent of browned butter is rich and warming—making your kitchen smell divine.
-
No Additives Required: You get big flavour naturally, without needing syrups or extra flavourings.
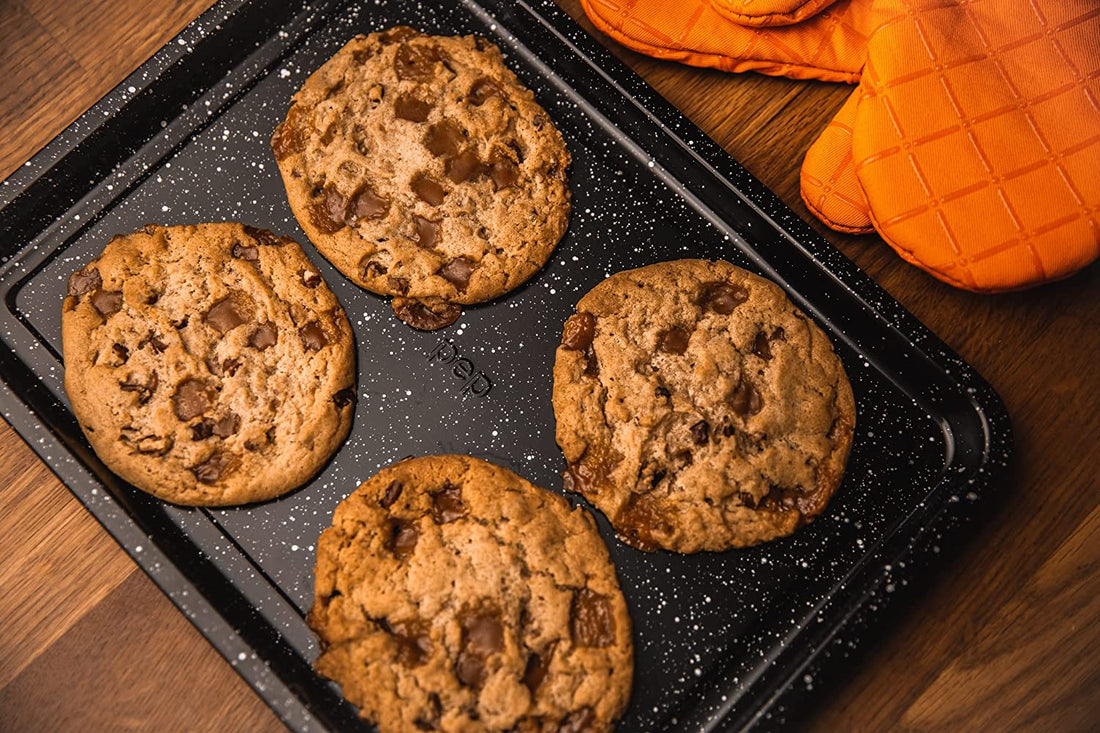
Equipment Spotlight: Pep Pans Non-Stick Baking Tray
Before diving into the recipe, let’s talk equipment. The Pep Pans Non-Stick Baking Tray is a must-have when baking cookies—especially those made with browned butter.
Why It’s Perfect for This Recipe:
-
Even Heat Distribution: Ensures your cookies bake uniformly, avoiding burnt edges and underdone centres.
-
Effortless Release: The superior non-stick coating means cookies slide off the tray without breaking.
-
Easy Clean-Up: No need for excessive scrubbing; a quick wipe-down is all it takes.
-
Durable Build: Its warp-resistant construction makes it suitable for repeated use at high baking temperatures.
Whether you're a weekend baker or a seasoned pro, using a quality tray like Pep Pans makes a noticeable difference.
Browned Butter Cookie Recipe
Makes: 20–24 cookies
Time: ~45 minutes (including chilling)
Ingredients
For the Browned Butter:
-
225g unsalted butter (cut into cubes)
For the Cookie Dough:
-
200g light brown sugar
-
100g granulated sugar
-
2 large eggs (room temperature)
-
1½ tsp vanilla extract
-
300g plain flour
-
1 tsp bicarbonate of soda
-
½ tsp salt
-
200g chocolate chips or chunks (dark or milk—your choice)
-
Optional: 100g chopped walnuts or pecans
-
Flaky sea salt (for topping)
Step 1: Brown the Butter
-
Place the cubed butter in a medium saucepan over medium heat.
-
Stir constantly as it melts. Once fully melted, it will start to foam.
-
Keep stirring until golden brown specks form at the bottom and it gives off a nutty aroma—this takes about 5–7 minutes.
-
Remove from heat immediately to avoid burning.
-
Pour into a heatproof bowl and let it cool for at least 10–15 minutes.
Tip: You’ll notice some brown solids at the bottom—don’t discard them. They’re flavour gold!
Step 2: Mix the Dough
-
In a large bowl, combine the browned butter, light brown sugar, and granulated sugar. Beat until smooth.
-
Add eggs and vanilla. Mix until glossy and well incorporated.
-
In a separate bowl, whisk together flour, bicarbonate of soda, and salt.
-
Gradually add the dry ingredients into the wet mixture. Stir just until combined.
-
Fold in the chocolate chips and nuts (if using).
Optional: Cover and refrigerate the dough for 30–60 minutes for a deeper flavour and thicker cookies.
Step 3: Bake
-
Preheat your oven to 175°C (fan 160°C / 350°F).
-
Line your Pep Pans Non-Stick Baking Tray with baking paper (or skip if you're confident in the tray’s non-stick power).
-
Scoop cookie dough balls (about 1.5 tablespoons each) onto the tray, leaving at least 5cm between each.
-
Sprinkle each dough ball lightly with flaky sea salt.
-
Bake for 10–12 minutes or until the edges are golden but centres are still soft.
-
Let them rest on the tray for 5 minutes before transferring to a wire rack.
Cookie Tips & Troubleshooting
|
Problem |
Solution |
|
Cookies too flat |
Chill the dough longer or add a tablespoon more flour. |
|
Too cakey |
Avoid over-beating once the flour is added. |
|
Burnt bottoms |
Use a high-quality tray like Pep Pans that resists hot spots. |
|
Lacking flavour |
Don’t rush the browning process—golden specks are key. |
Variations to Try
-
Espresso Browned Butter Cookies: Add 1 tsp of instant espresso powder to the dough for a mocha kick.
-
Browned Butter Oat Cookies: Substitute 100g of flour with rolled oats.
-
Salted Caramel Chip Cookies: Replace half the chocolate chips with caramel bits and use salted butter.
The Science Behind the Flavour
When you brown butter, you're initiating the Maillard reaction, where the milk proteins and sugars react under heat. This creates complex molecules that give browned butter its signature nuttiness and warm, roasted flavour. It’s similar to the process that gives a steak its seared crust or toast its golden crunch.
Why Home Bakers Love Browned Butter
Home bakers frequently return to browned butter for its versatility. It doesn’t just belong in cookies; it's amazing in:
-
Shortbread
-
Banana bread
-
Brownies
-
Buttercream
-
Even savoury sauces
Once you've mastered browning butter, your baking—and even your savoury dishes—will never be the same.
Why Pep Pans Deserves a Spot in Your Kitchen
Pep Pans Non-Stick Baking Trays have quickly earned a reputation for being dependable, durable, and stylish. When making browned butter cookies, using a sub-par tray can undo all your hard work. Pep Pans trays provide:
-
Precision results: Even bakes, consistent results, and minimal spread.
-
No sticking: Even with caramel-heavy doughs, cookies lift easily.
-
Sustainability: Built to last—no need to frequently replace cheap trays.
Their trays are oven-safe up to high temperatures, and a dream to clean. Simply put, they're a baker’s best friend.
Gluten-Free Browned Butter Cookies Recipe
Makes: 20–24 cookies
Time: ~45 minutes (including chilling)
100% Gluten-Free
No wheat, rye, or barley. Just flavour-packed cookies with a golden crisp edge and chewy centre.
Ingredients
For the Browned Butter:
-
225g unsalted butter (cubed)
For the Cookie Dough:
-
200g light brown sugar
-
100g granulated sugar
-
2 large eggs (room temperature)
-
1½ tsp vanilla extract
-
270g gluten-free plain flour blend (with xanthan gum)
-
1 tsp bicarbonate of soda
-
½ tsp salt
-
200g gluten-free chocolate chips or chopped chocolate
-
Optional: 100g chopped nuts (e.g., pecans or walnuts)
-
Flaky sea salt (for topping)
Step-by-Step Instructions
1. Brown the Butter
-
In a medium saucepan over medium heat, melt the butter.
-
Stir constantly as it foams, then turns golden brown with brown flecks at the bottom (~6 minutes).
-
Immediately remove from heat and pour into a mixing bowl. Cool for 10–15 minutes.
2. Make the Dough
-
Stir both sugars into the cooled browned butter. Beat until smooth.
-
Add eggs and vanilla extract; beat again until glossy.
-
In a separate bowl, whisk the gluten-free flour blend, bicarbonate of soda, and salt.
-
Gradually combine dry ingredients into wet, stirring until no dry pockets remain.
-
Fold in chocolate chips and nuts, if using.
Note: Gluten-free doughs can be slightly more delicate—don’t overmix.
3. Chill the Dough (optional but recommended)
-
Chill for 30–60 minutes to help hydrate the flour and prevent spreading.
4. Bake
-
Preheat oven to 175°C (fan 160°C / 350°F).
-
Line your Pep Pans Non-Stick Baking Tray (no need for grease or paper if using this tray).
-
Scoop dough into 1.5 tbsp-sized balls and place 5cm apart.
-
Sprinkle with flaky salt.
-
Bake for 10–12 minutes until golden edges form.
-
Cool on the tray for 5 minutes before moving to a wire rack.
Tips for Gluten-Free Success
|
Tip |
Why it Matters |
|
Use a flour blend with xanthan gum |
It adds structure, mimicking gluten’s elasticity |
|
Don’t overmix |
Keeps cookies tender and prevents grittiness |
|
Chill the dough |
Prevents spreading and enhances texture |
|
Bake on Pep Pans tray |
Helps achieve even colour and no sticking, especially with delicate GF dough |
Recommended Gluten-Free Flour Brands (UK)
-
Doves Farm Gluten-Free Plain White Flour
-
Freee by Doves Farm (with xanthan gum)
-
Bob’s Red Mill 1-to-1 Baking Flour (imported but excellent)
If your blend doesn't contain xanthan gum, add ½ tsp per 270g of flour.
Gluten-Free Doesn’t Mean Flavour-Free
The browned butter brings bold, rich flavour that masks any subtle differences from using gluten-free flour. Combined with quality chocolate and the ideal bake from Pep Pans trays, these cookies taste just as indulgent and crowd-pleasing as the original.
Final Thoughts
Browned butter cookies are more than just biscuits—they’re an experience. Rich, layered, and indulgent, they demonstrate how a simple technique can completely transform your baking. When paired with the right tools—like the Pep Pans Non-Stick Baking Tray—you’re equipped for cookie perfection.
Whether you're baking for family, friends, or just yourself (no judgment!), these cookies are guaranteed to impress. Just one bite, and you’ll taste the difference browned butter makes.